


How to make an advent calendar
The world of Hobbycraft, winter woodland painting + the upside down calendar

Also guys 🍿
I spoke recently about trying to spend my time outside of work being more creative. So, despite it being October at the time I decided to create an advent calendar for Ads.
It was a fun festive project for me and I thought it would be nice to fill with various gifts come December.
It turned out pretty well (I think!) so I’m going to walk you through it in case you’re looking for a good gift or an arty project to get stuck into!

What you’ll need:
I’ve linked all of the products I used from Hobbycraft & Amazon in case you’re interested:
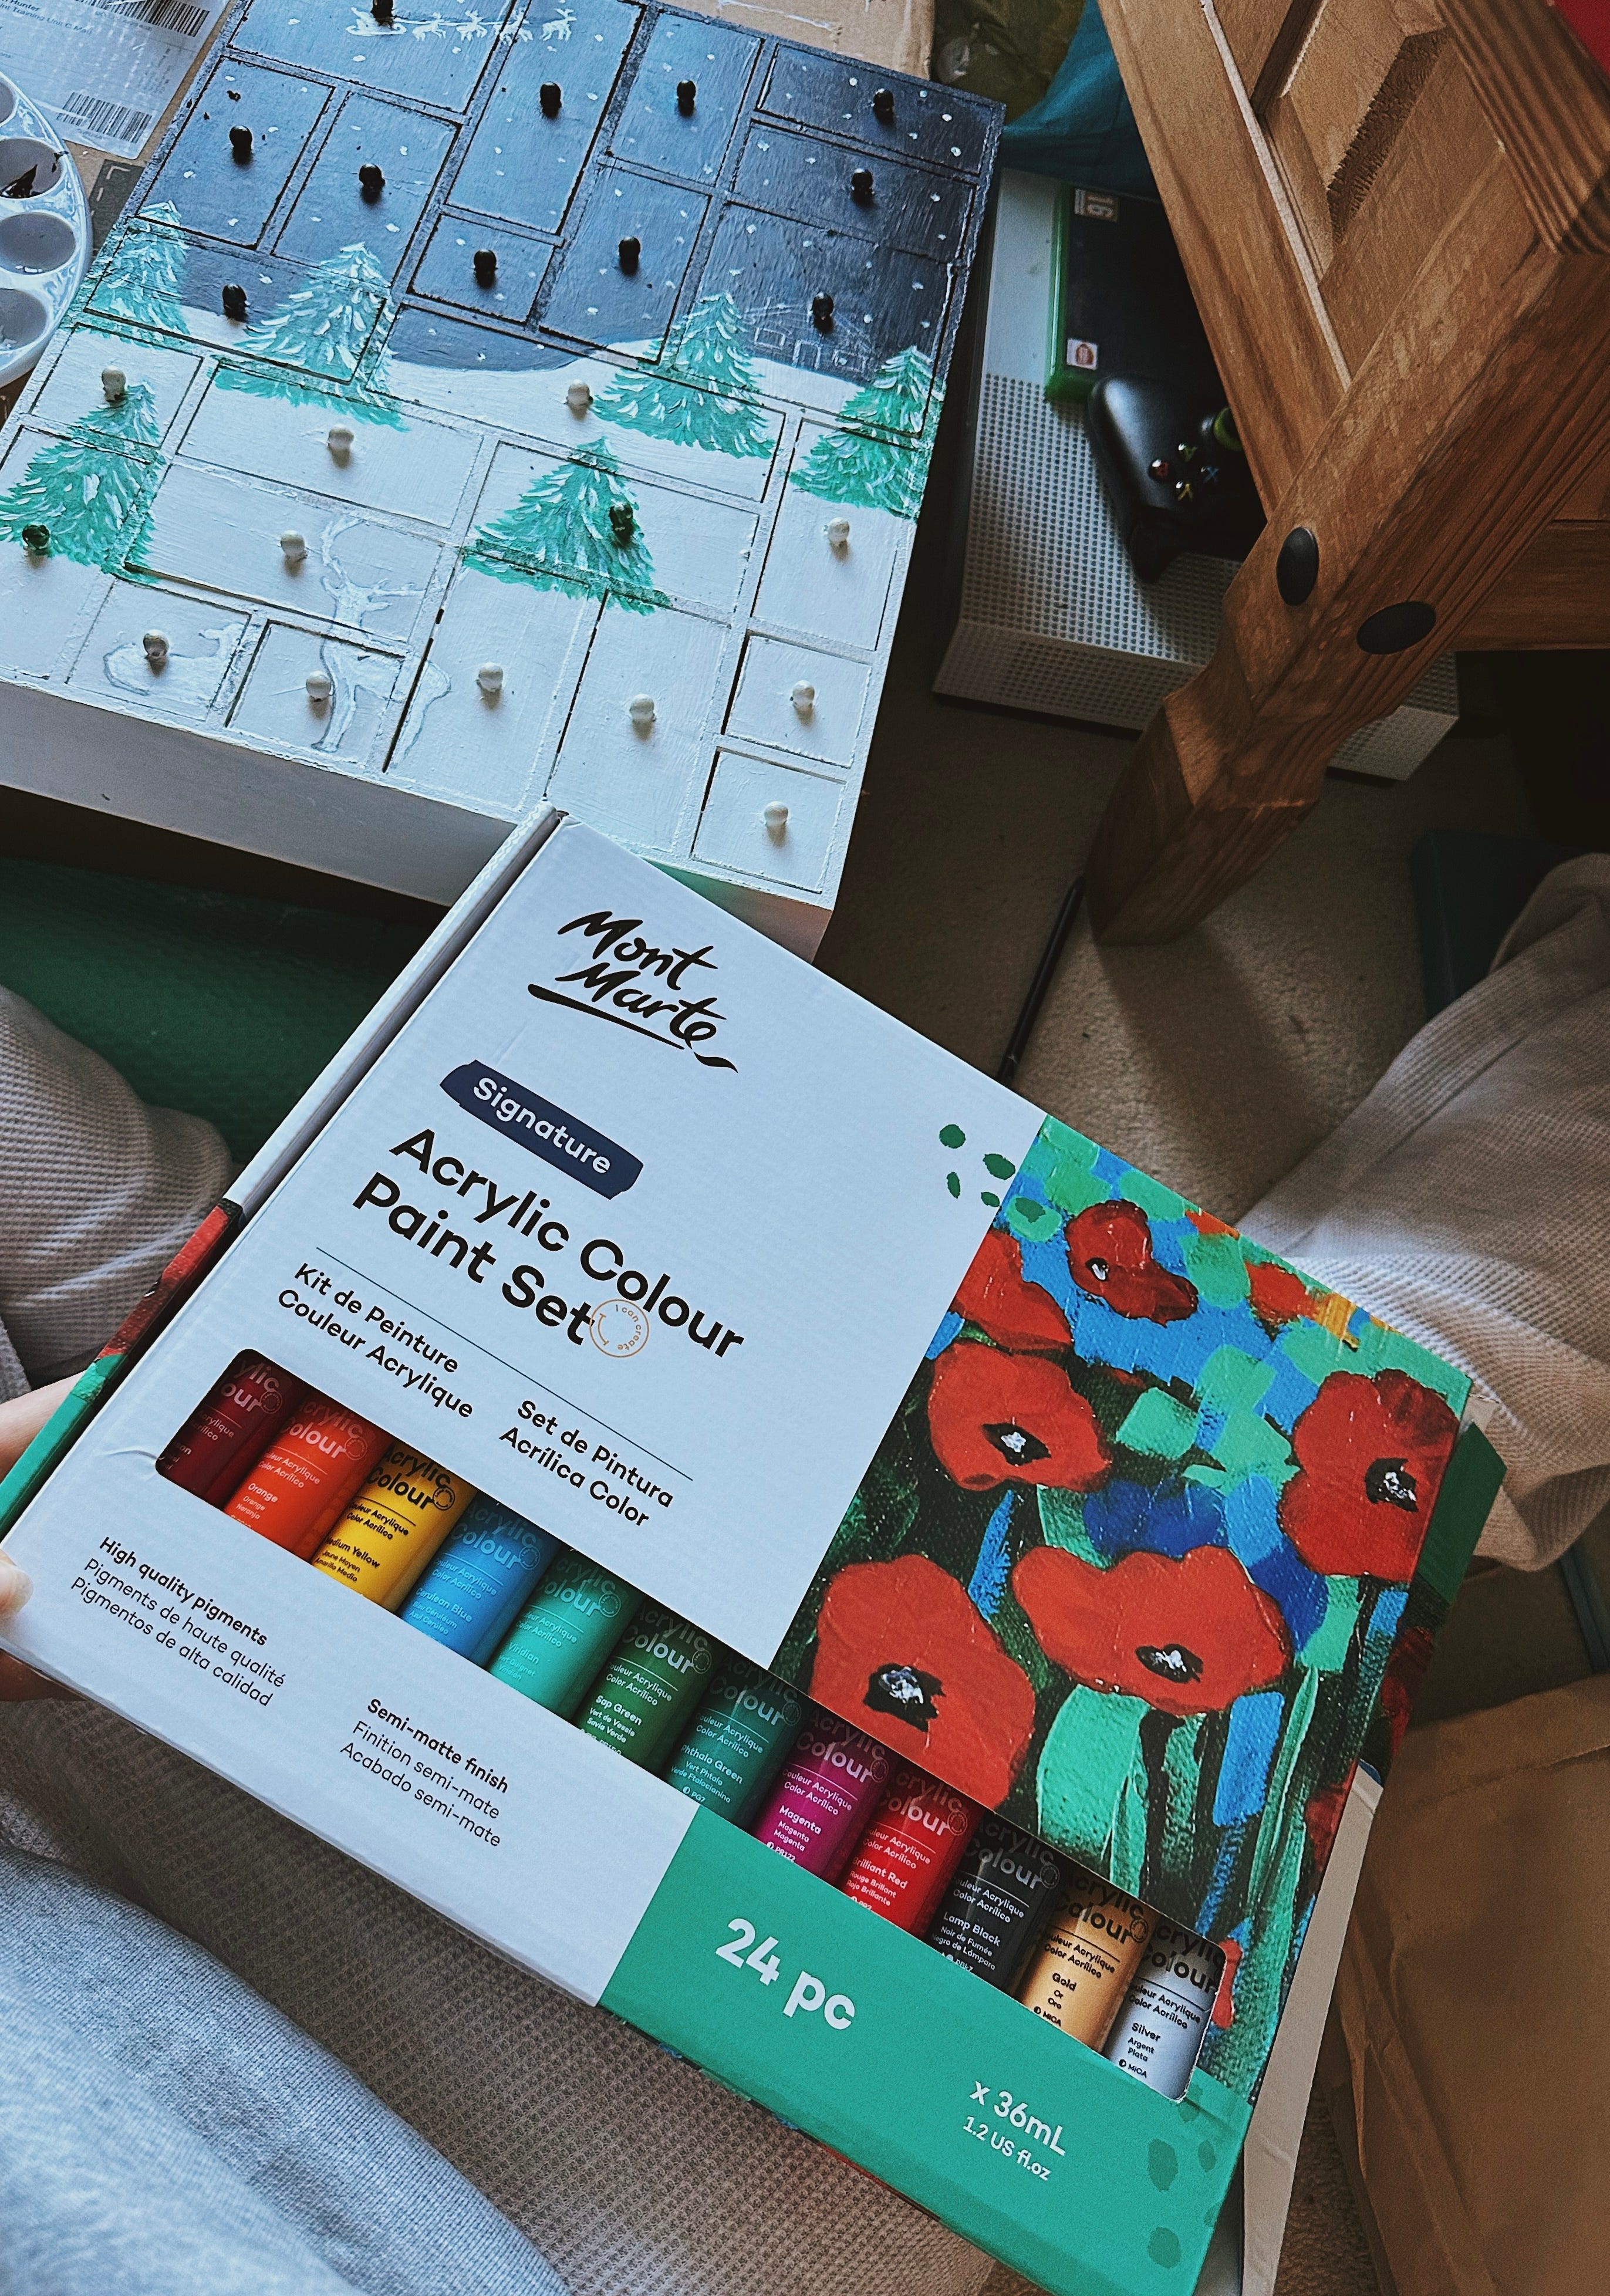
Acrylic paint tubes (I got white, dark blue, metallic silver and a couple of shades of green)
Large paintbrush (for base coat)
Painbrush set (for the details)
Step 1: The Calendar
Hobbycraft is crafting heaven but unfortunately there’s not one near me so I took to navigating its online store.
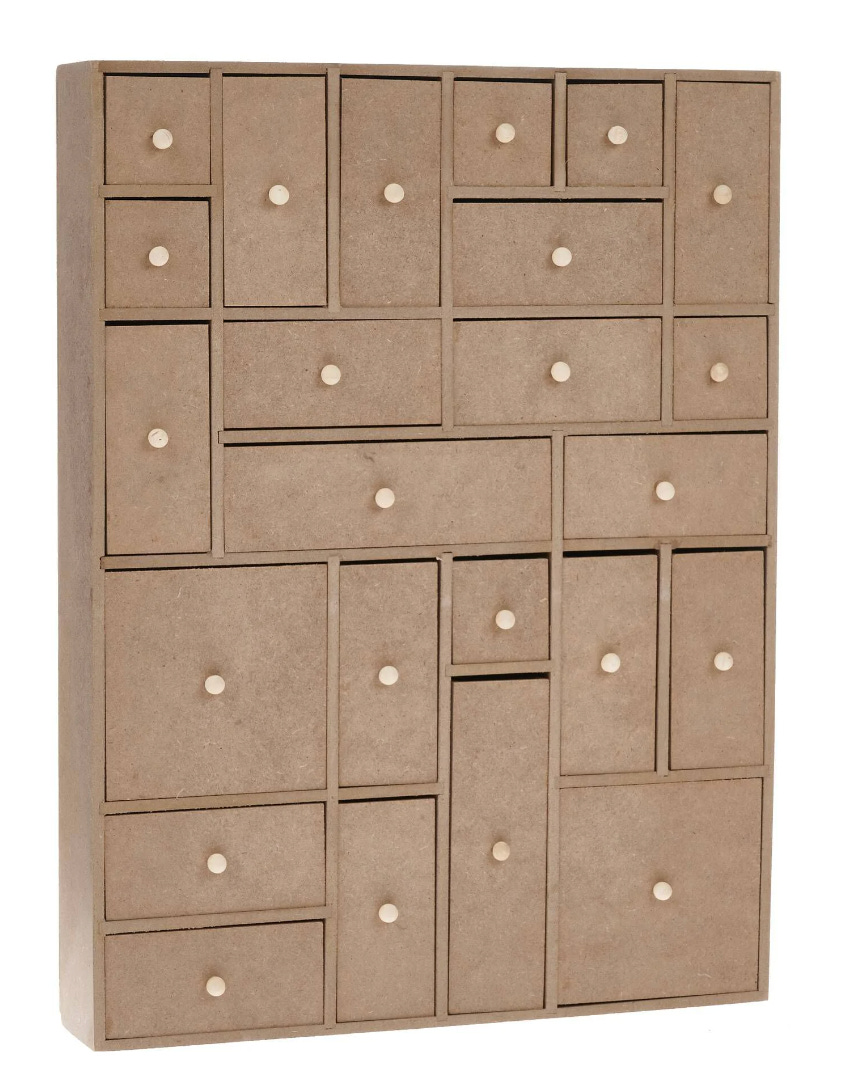
For £16 I was the proud owner of a wooden refillable advent calendar (linked above).I then got a few bigger tubes of acrylic paint in the main colours I knew I would use, as well as some paintbrushes and a palette.
Step 2: Realistic Expectations
Past artistic endeavours have taught me to be realistic with the planning of a project. Set the bar too high and it’s destined to become its own version of the Hedgehog Cake Meme.
Hobbycraft is very good at luring you into this trap with its ‘inspiration’ area. Unfortunately, unless you happen to be a professional artist, it’s best to aim a little lower than this.

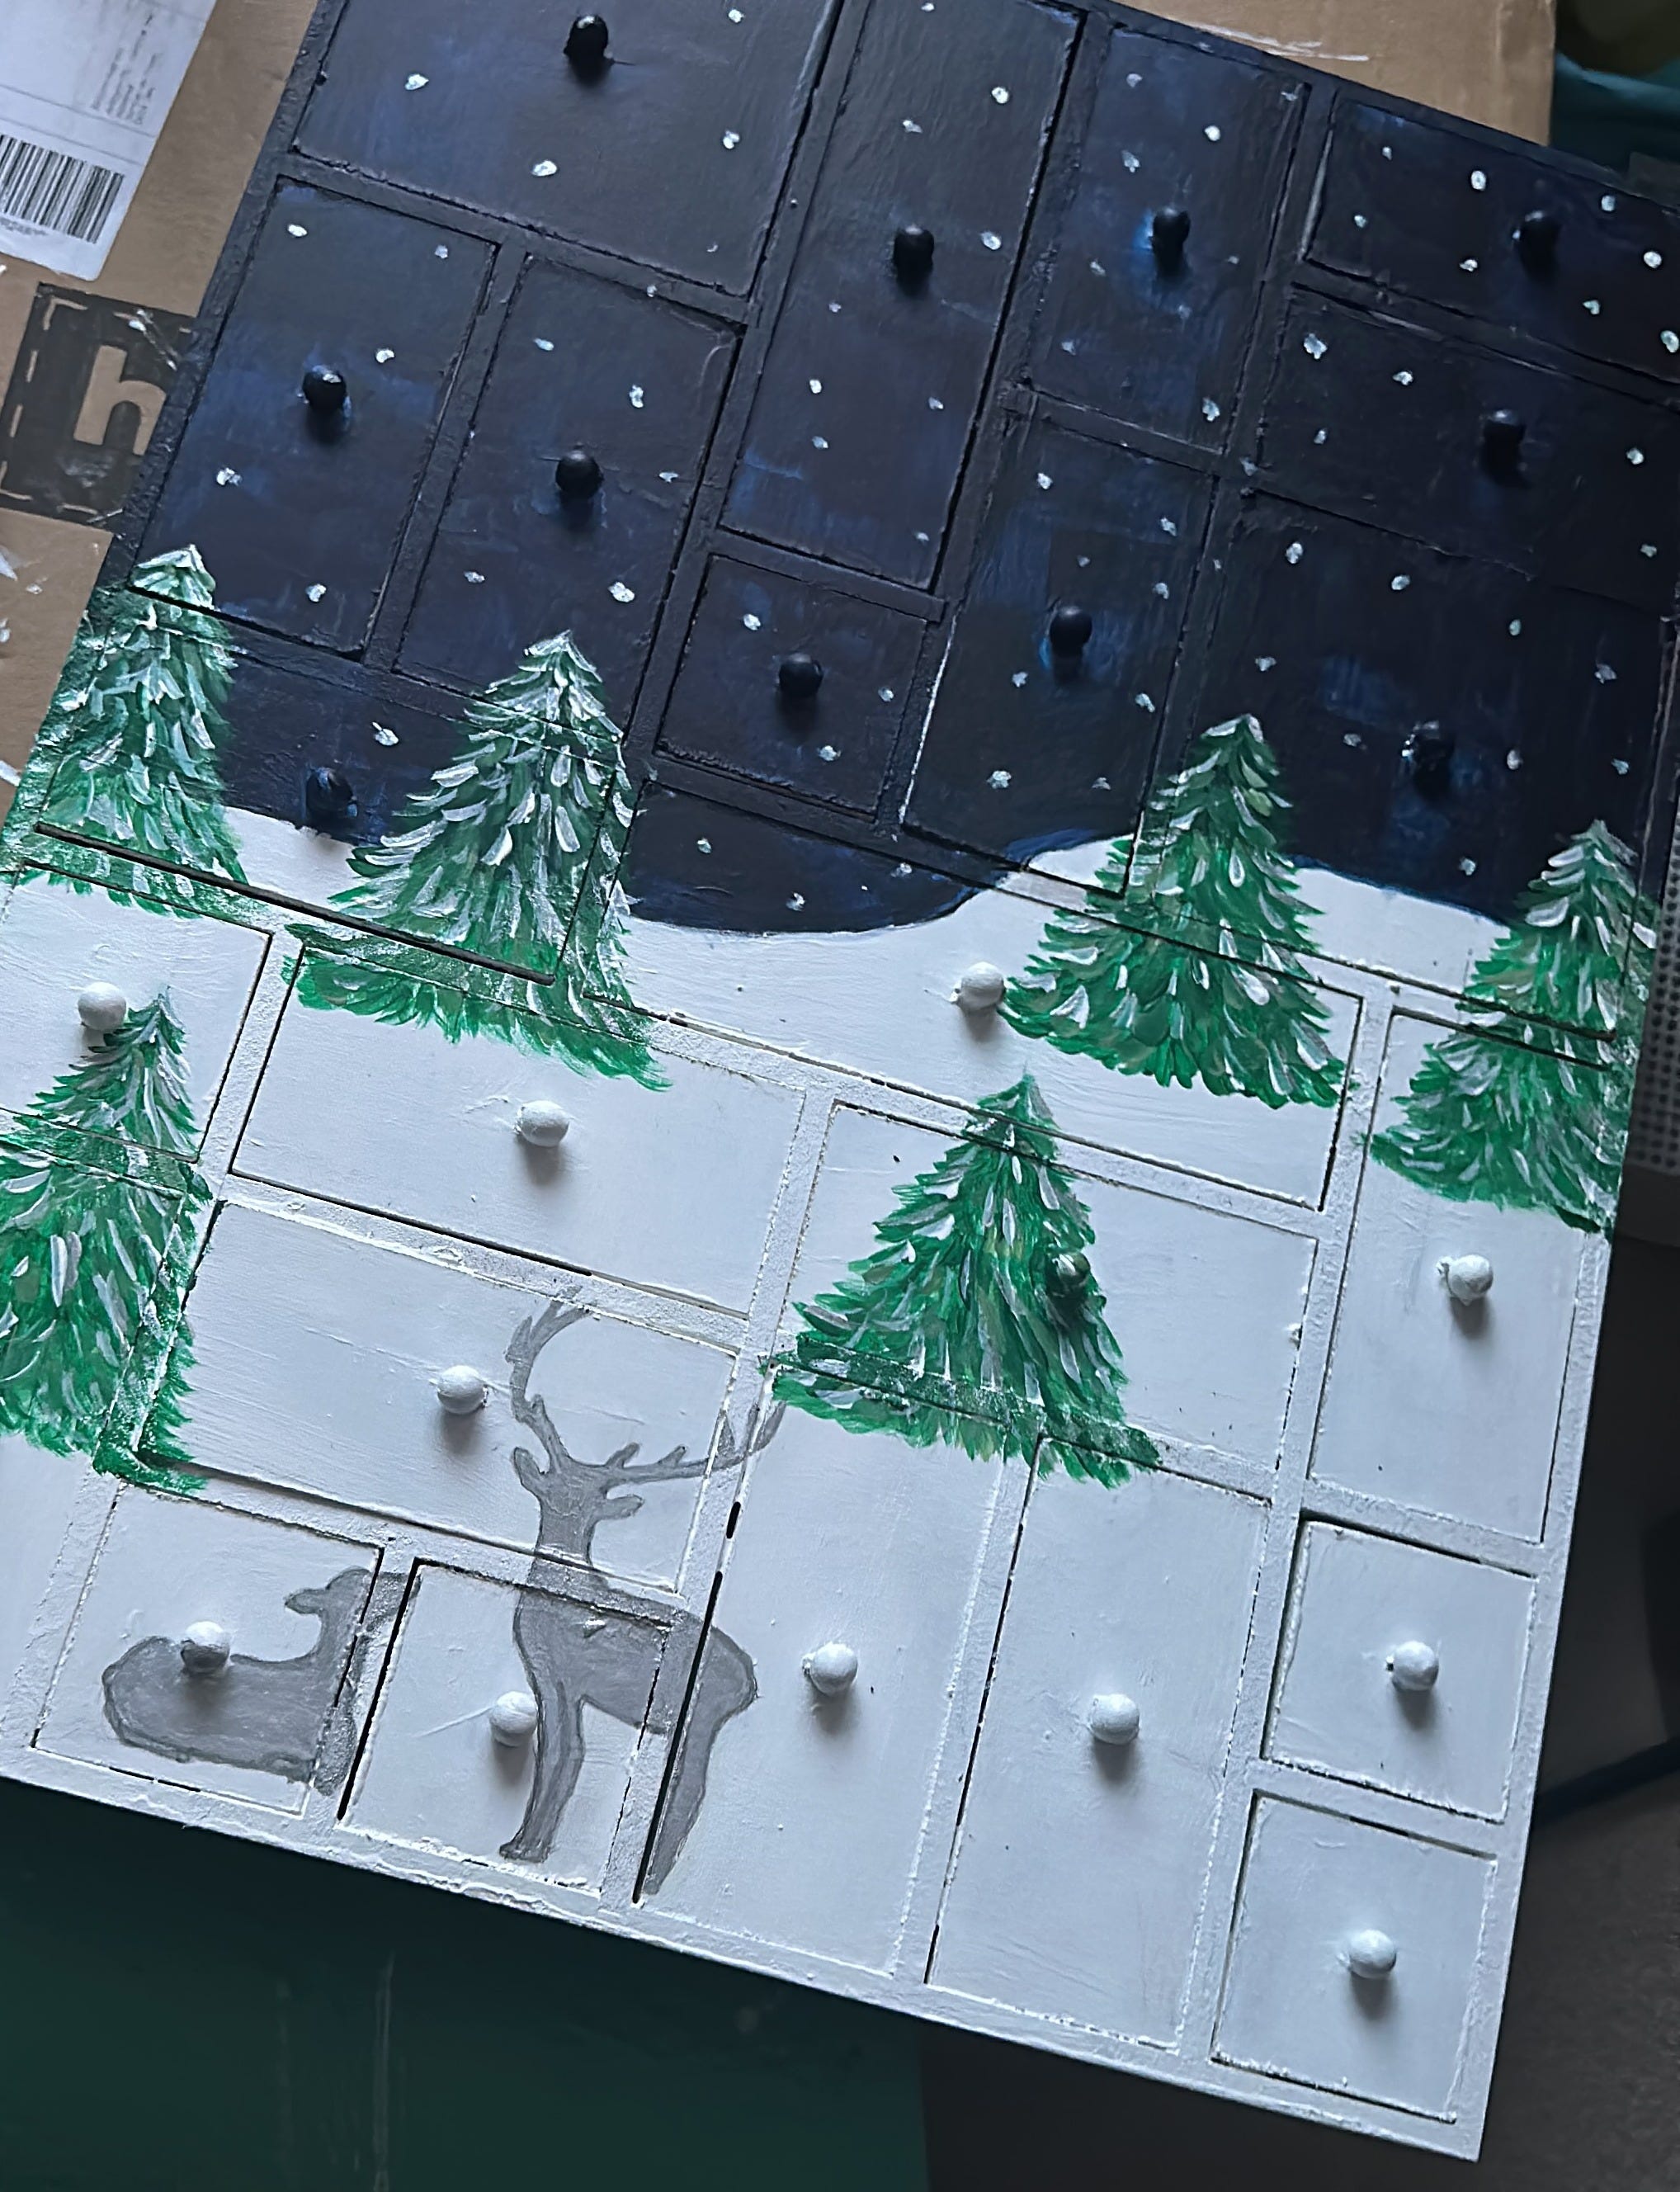
I had the idea of a wintry woodland scene, so I knew there’d be a snowy night sky and trees, and perhaps some festive animals such as deer and robins.
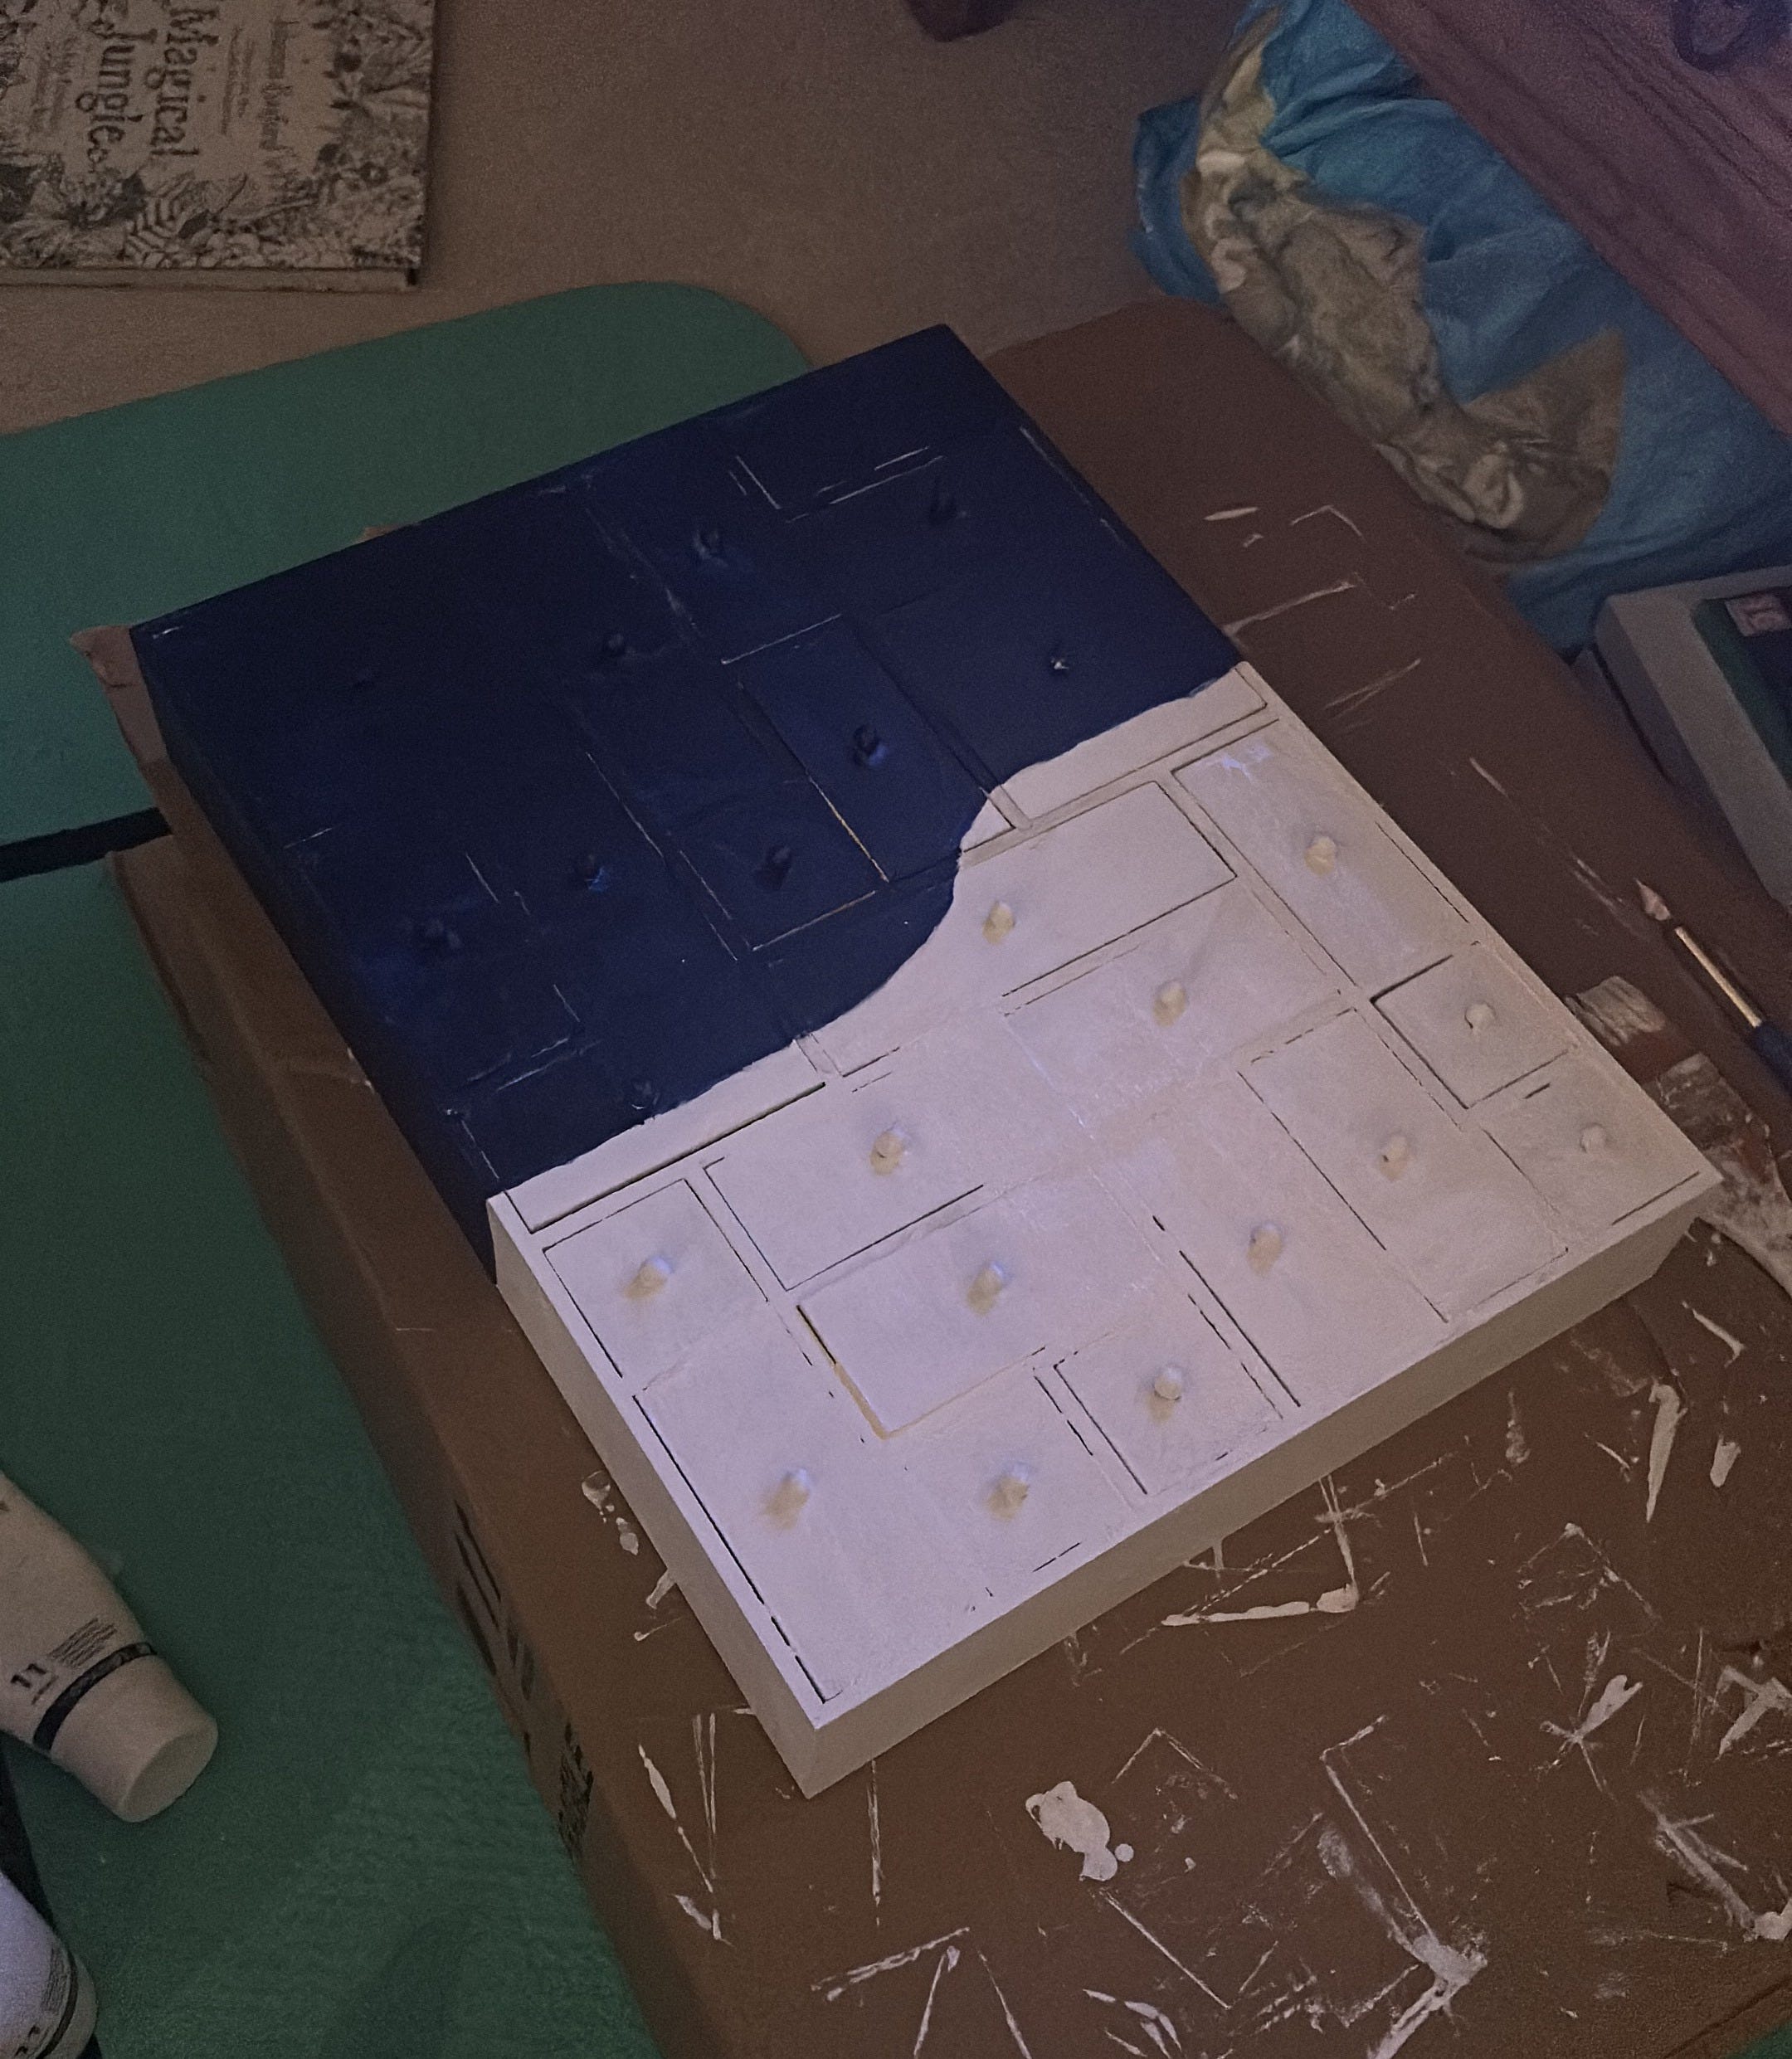
The first step was easy, I took out all of the drawers and painted them white individually, as well as the main frame.
I left them to dry fully before applying another coat. I don’t have a hairdryer so I had to busy myself with other things as I waited, but if you’re impatient then using a hairdryer will speed the process up a bit.

Step 3: The Outline
I used a pencil to draw the cut-off between the sky and snowy ground. Then I used a deep blue to paint the sky, and another layer of white over the base coat for the snowy ground.
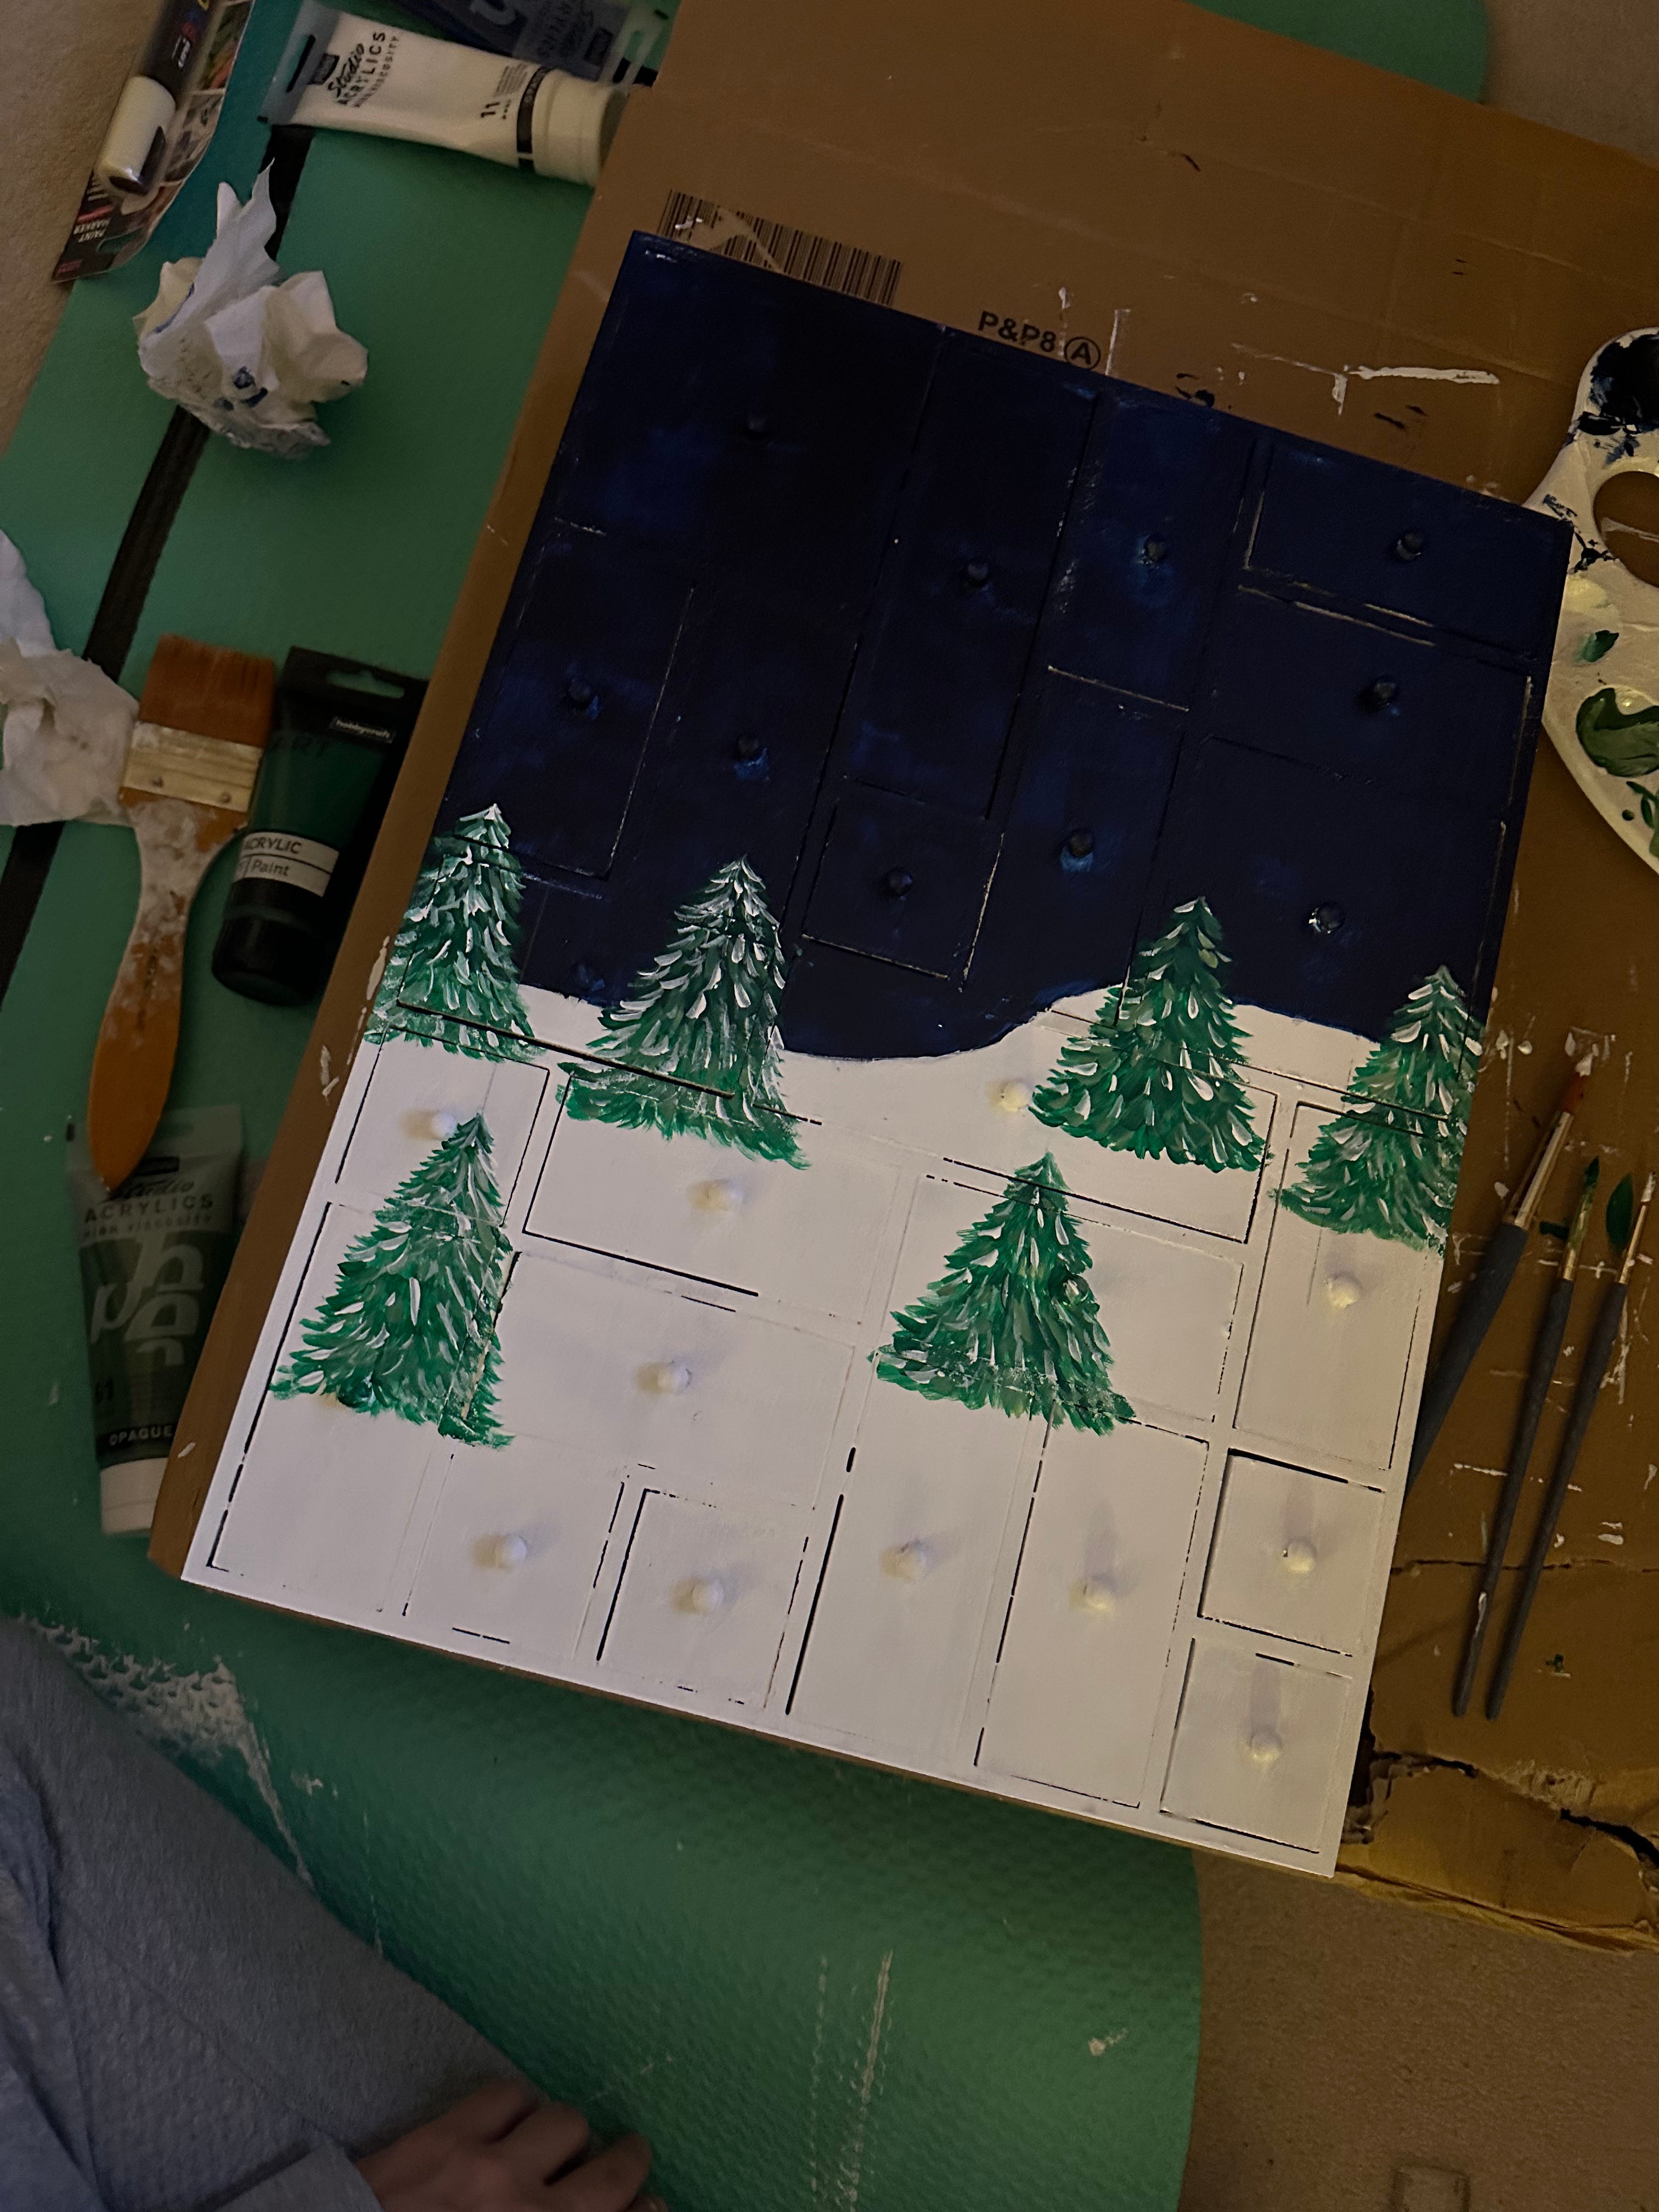
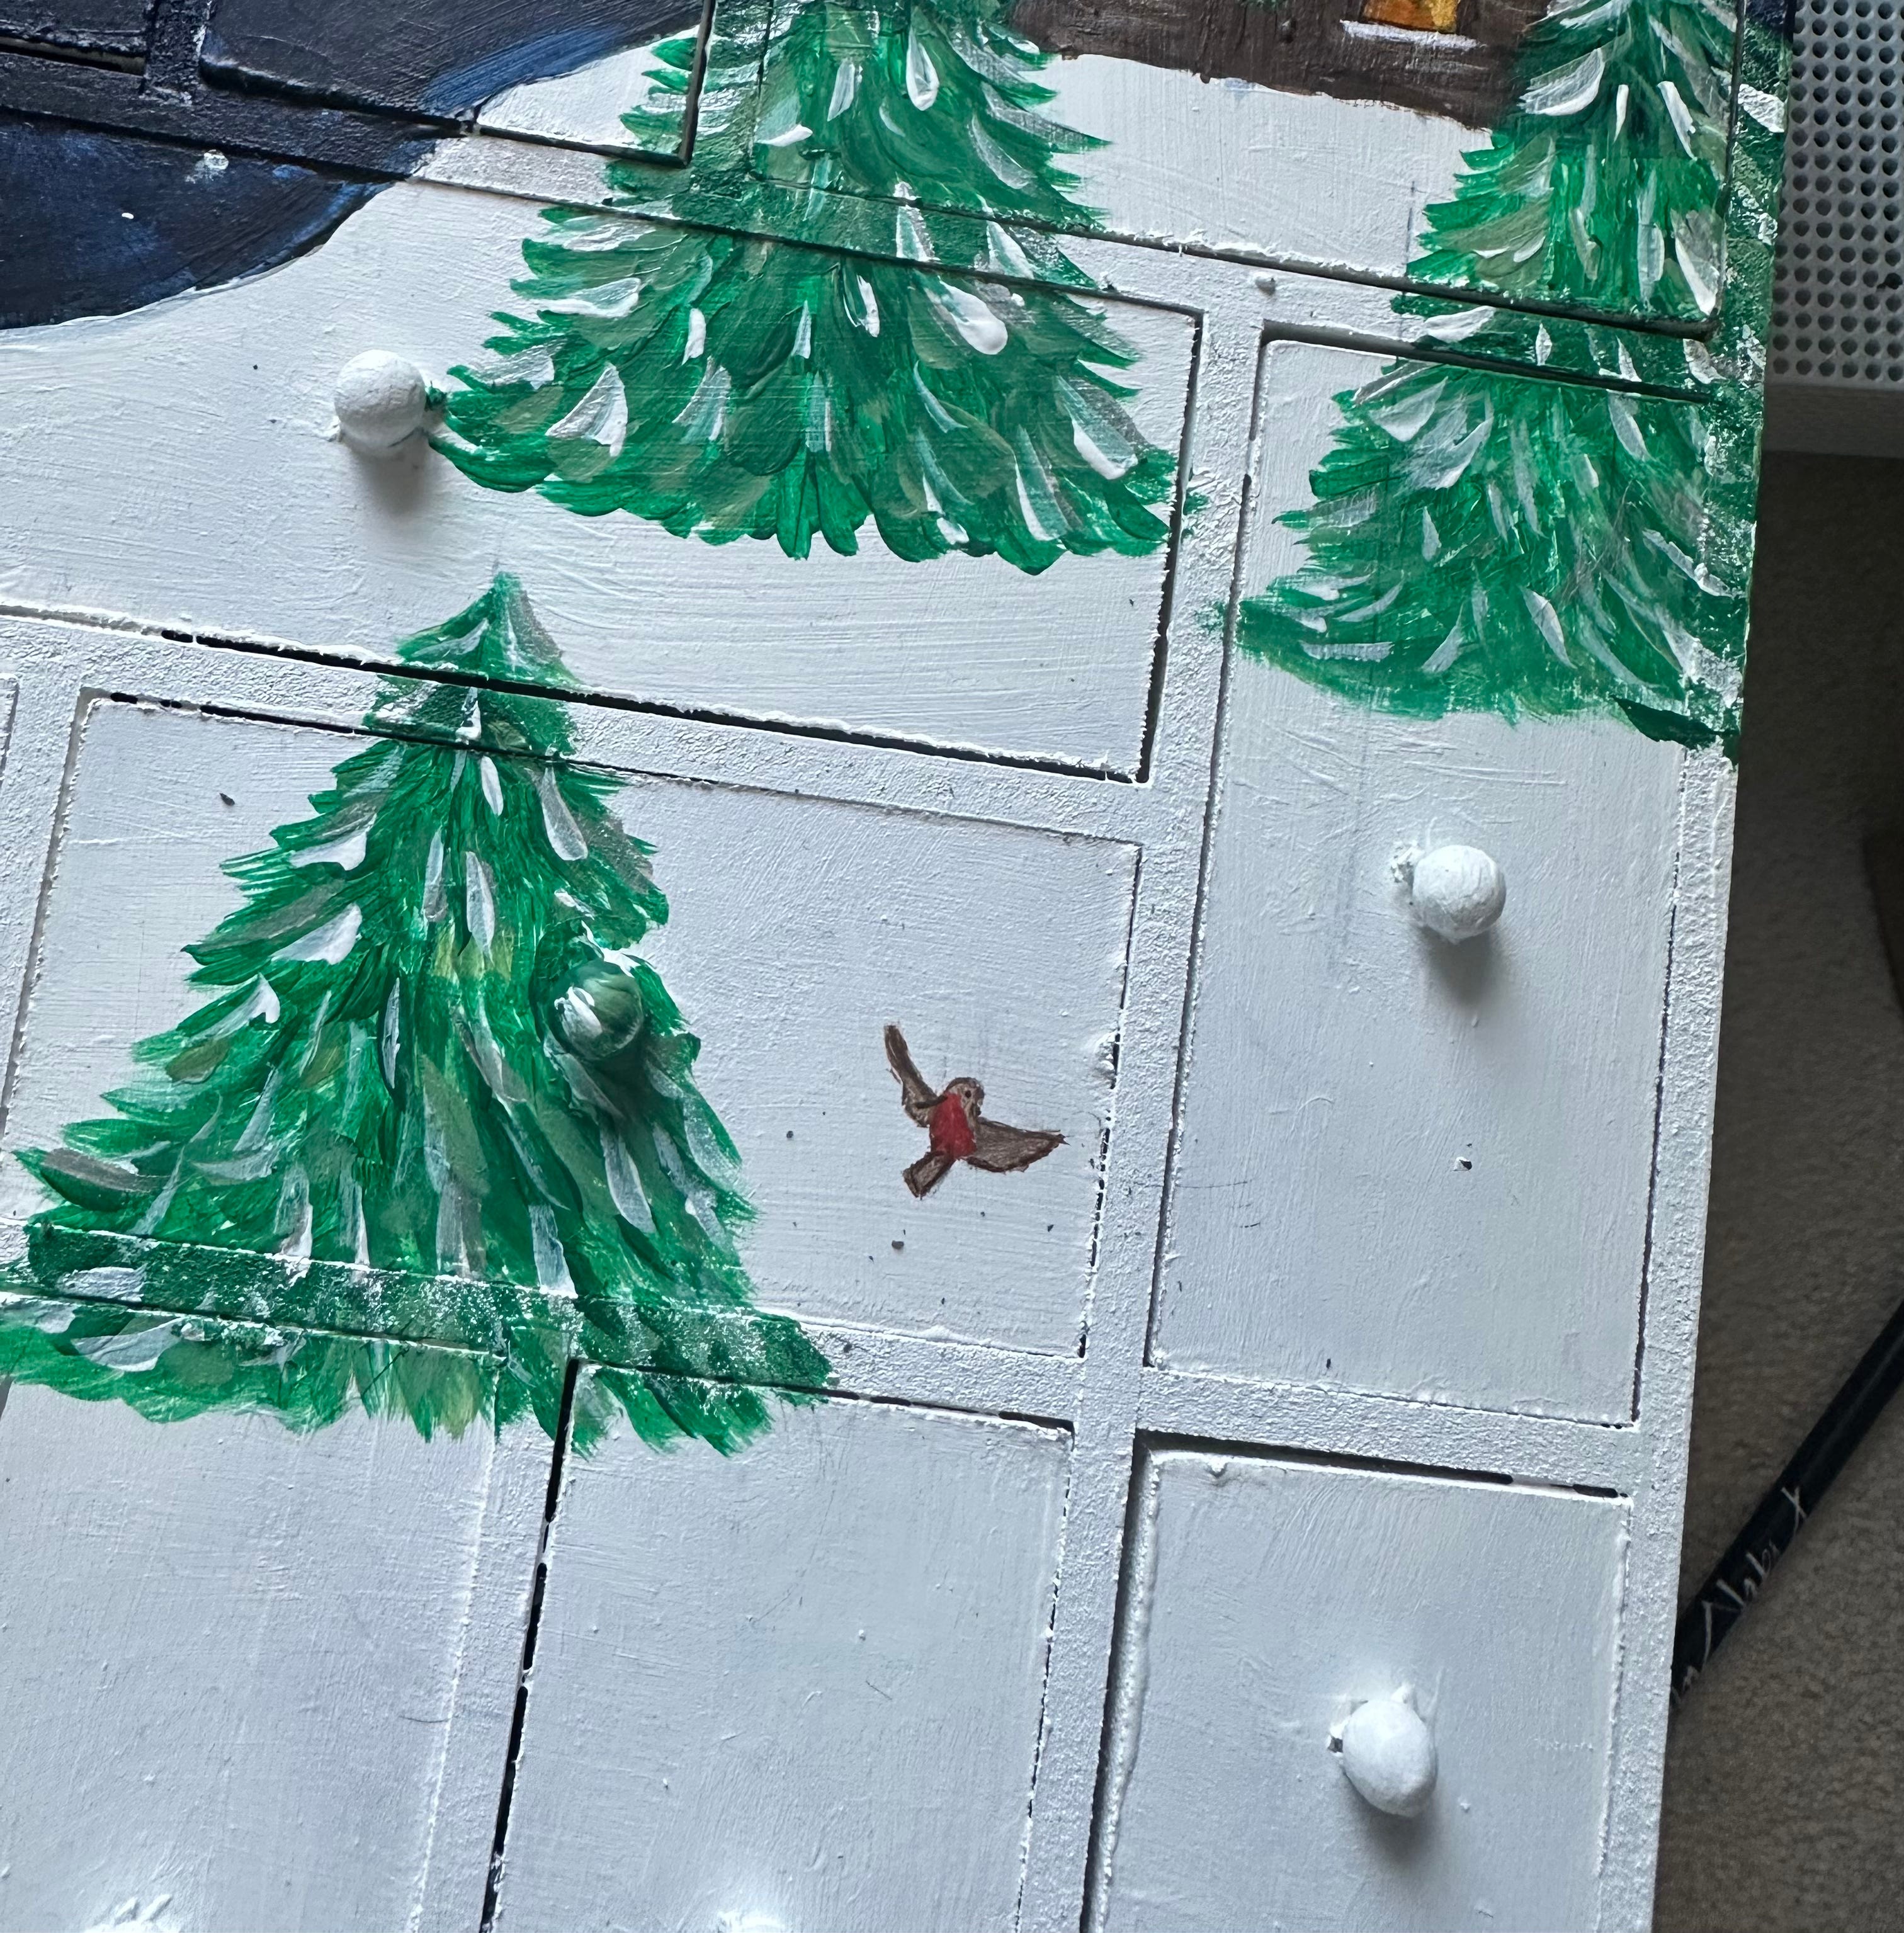
Step 4: The Forest
I did a little bit of research into the different ways of painting trees before settling on the style I used. Here is a very impressive video sharing 3 ways you can paint a Fir tree.
I used pencil and a ruler to draw the lines on which I wanted the trees to be centred and used different shades of green to build the trees, before adding a bit of white and silver once dry.
Step 5: Snow + Deer
I applied a tiny bit of white acrylic to the end of a small paintbrush and used this to add little dots of snow to the night sky.
I then went over some of them with a bit of silver paint to add some shimmer.


I wanted the silhouette of a deer looking directly at the observer and painted in shimmery silver.
A deer is not the easiest thing to draw, especially with antlers, so I decided to base mine on a cutout.
I found an old Christmas card with a deer and very carefully cut it out. (I’d suggest printing one out!)
I used it for the antlers and the rough shape of the body, tracing it with pencil onto the calendar, before then re-drawing the outline smaller until it was the size I wanted it to be.
I then decided to add a baby deer looking up at its parent, which I did freehand following an image I’d found on Google. I used the smallest paintbrush I had to fill them in with silver acrylic paint.
Step 6: Santa’s Cabin & Sleigh
I decided to add this in because I felt something was missing. There was a spot between two trees that felt right for it, so after Googling Santa’s cabin for inspiration, I used pencil to draw the outline.
I then used different shades of brown to create the wood, and different shades of yellow-orange to create the glowing windows as I wanted them to look like they were exuding warmth.
I added a wreath and some chimney smoke as a final touch which required the use of my glasses because, again, painting details so small - not easy!


I did my best to add Santa’s sleigh being pulled off into the night sky by his flying reindeer. It was not easy painting something this detailed and small so there were a few errors that needed painting over to get the result I was after!
Step 7: Robins
I love robins and they’ve always been the festive bird of choice so I Googled images of them to try and find realistic shapes and colours. (Did you know they’re actually more grey and orange than brown and red?)
Pencil and rubber were both essential in drawing these as they were tiny and hard to get right. Once I’d rubbed them out and re-started a few times and was finally happy with the outline, I used the smallest paintbrush I had to fill them in.
Step 8: Numbers
I found it hard deciding where on each drawer to put the numbers, even though it shouldn’t matter! I used a silver metallic paint pen to draw the numbers on once the whole painting was dry.
Step 9: Unsealing the drawers
The paint had sealed most of the drawers shut so we used a thin, sharp knife to unstick them - and it was at this point that we realised I’d painted the whole thing upside down…
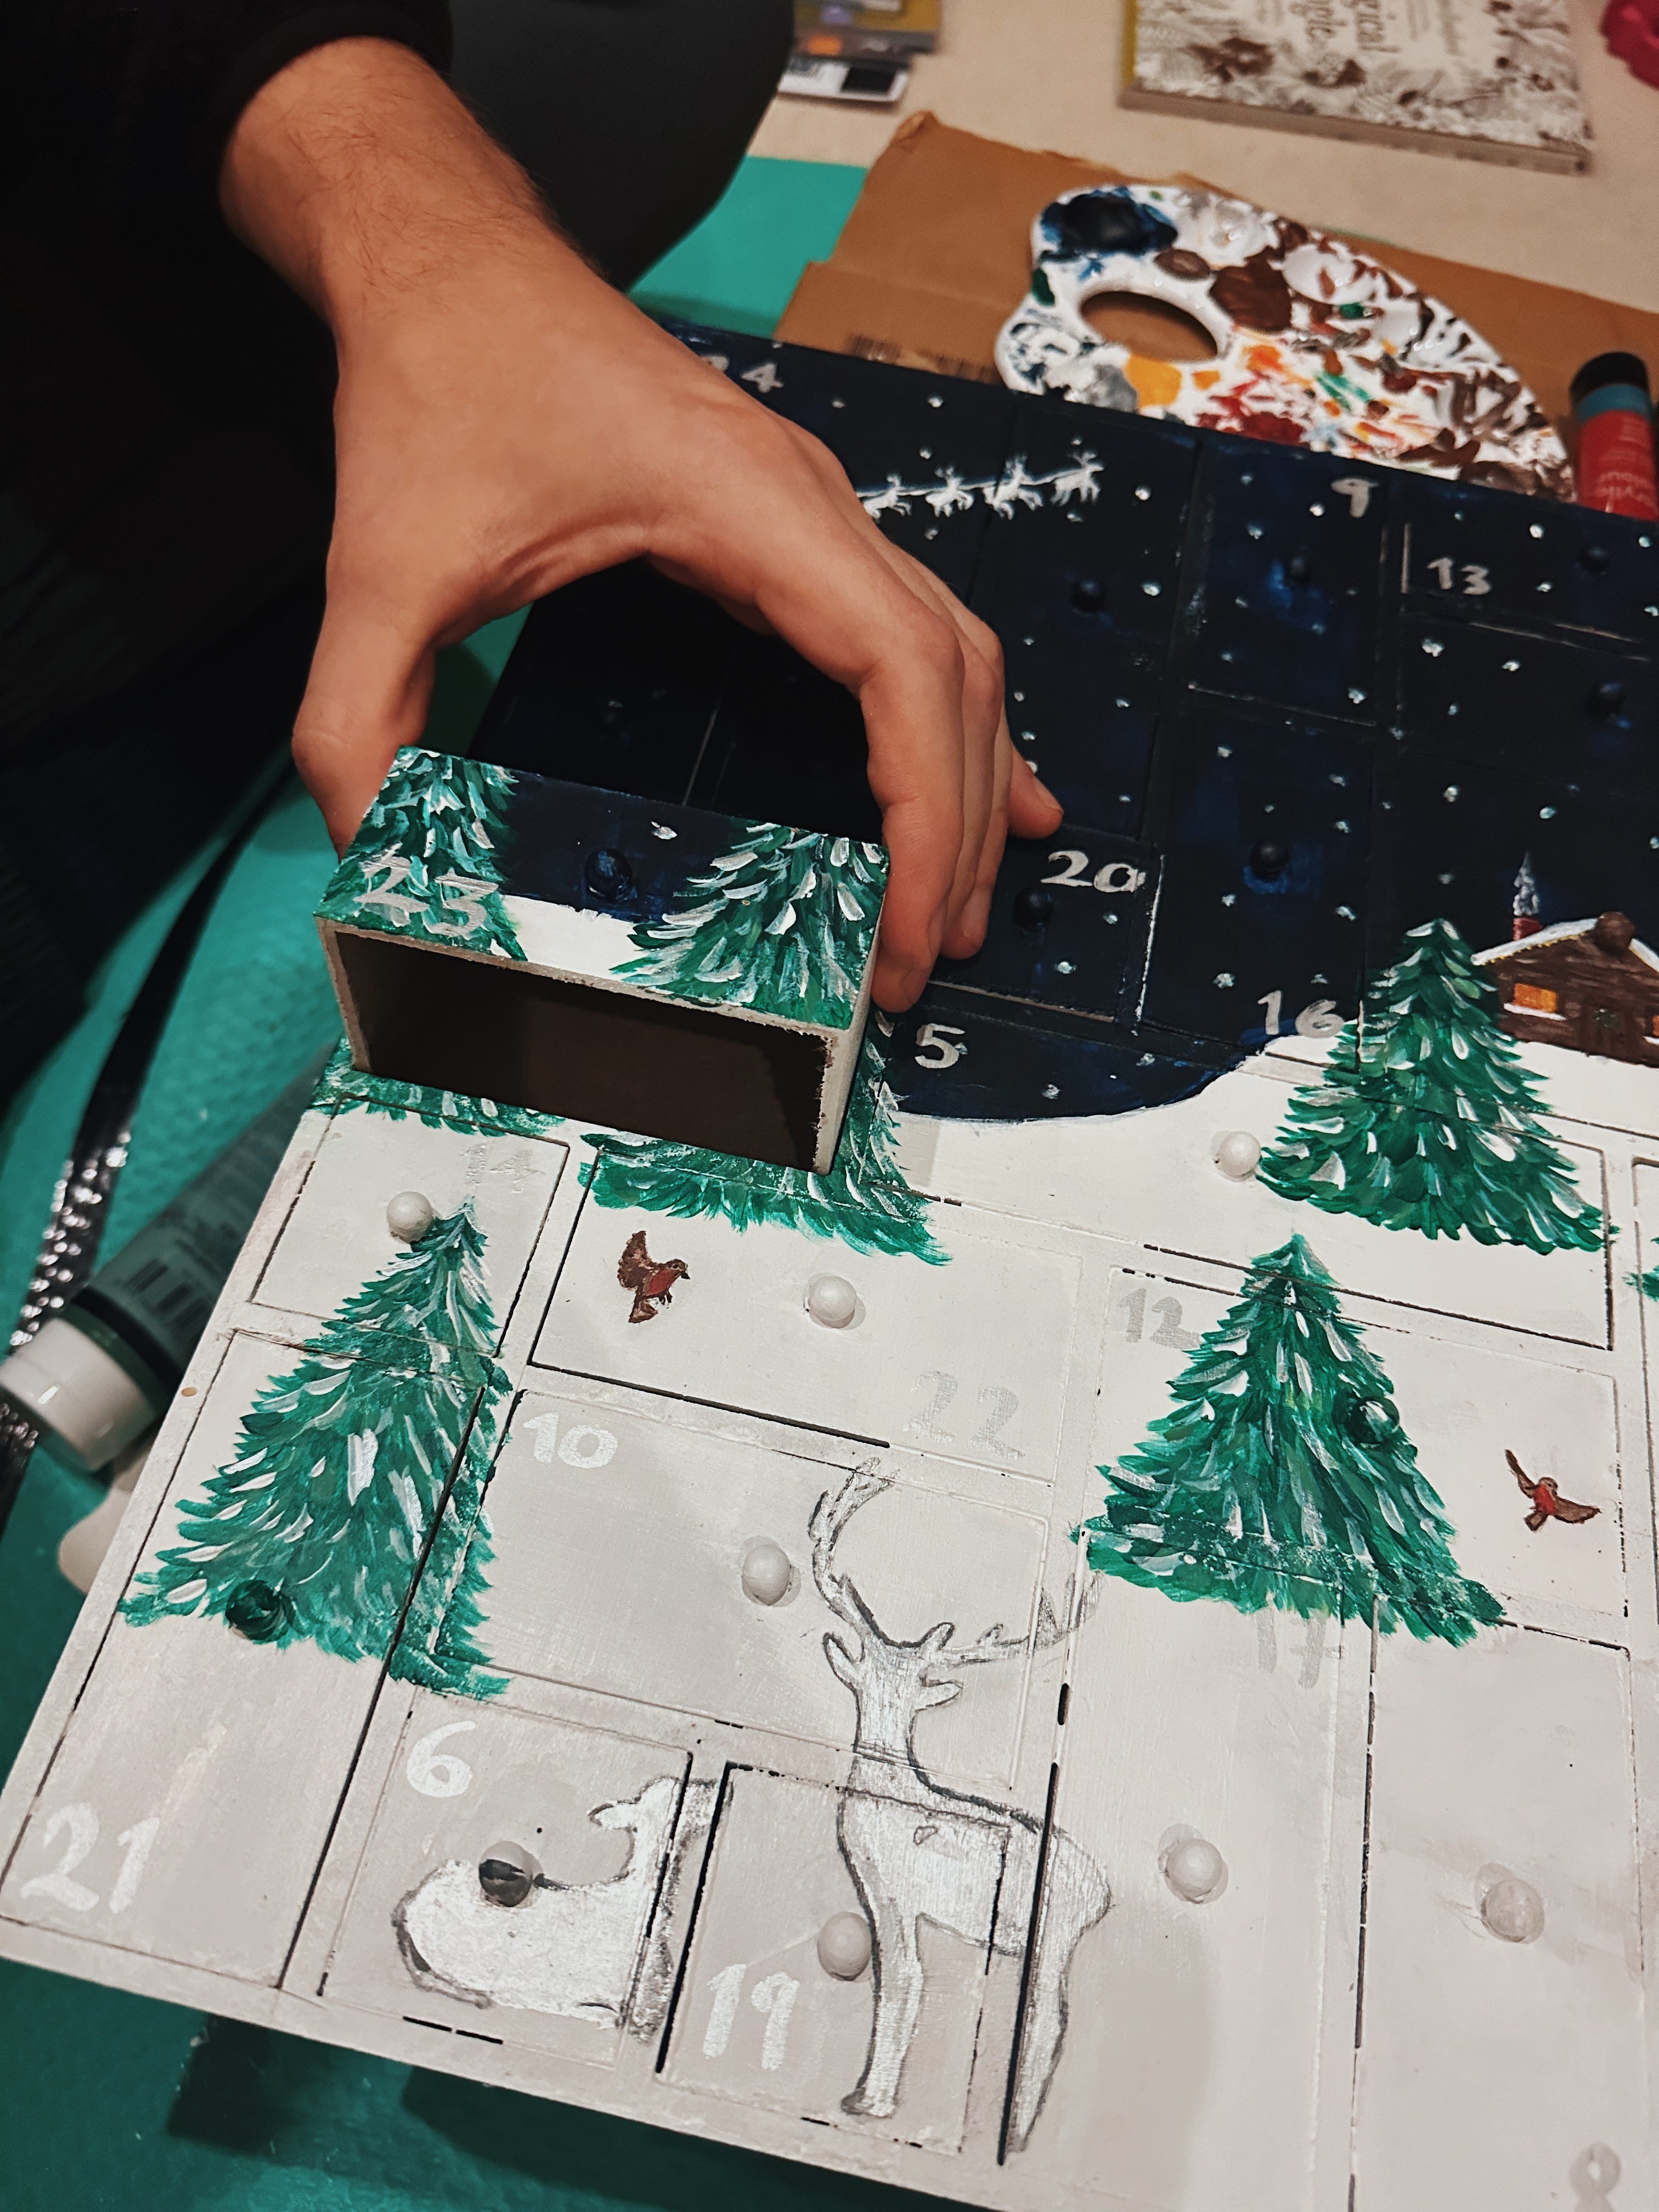
Every drawer was facing down and, although I can laugh about it now, it was pretty gutting at the time.
After I had painted all of the drawers with their white base layer and put them back in to their places, I had decided that I wanted the bigger squares at the top of the advent calendar and, stupidly, began to paint like that without changing the drawers.
Disappointing but I’ll know for next time and hopefully you’ll learn from my mistake if you give this a go!
I’d share some ideas for Advent fillers but unfortunately I need to keep them a secret for now - maybe next year!
Happy painting x